HI everyone, today I have a BAP Pictorial with the FlyingUnicorn January KOM to share with you. I have included lots of steps along the
way to share how I have created this.
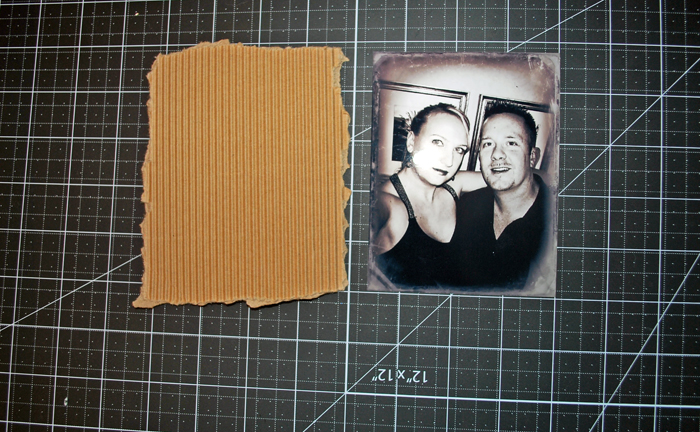
Step 1:
Choose some coordinating papers from the kit. I have also
included that yummy corrugated board to work with.
Step 2:
Trim the top sheet, I have made it about 11 ¼ x 11 ¼ .
Distress edges on top and bottom sheets. On the top sheet I have used some
Vintage Photo Distress Ink from Tim Holtz.
Step 3:
Glue the two sheets together.
Step 4:
Tear the corrugated board by hand, a piece just a bit bigger
than your photo.
Step 5:
From one of the coordinating papers tear by hand a piece
larger than the torn corrugated board piece. Use the same Vintage Photo
Distress Ink and do the edges.
Step 6:
Just lay these pieces on the layout until you like the
placement of them. Do not attach yet.
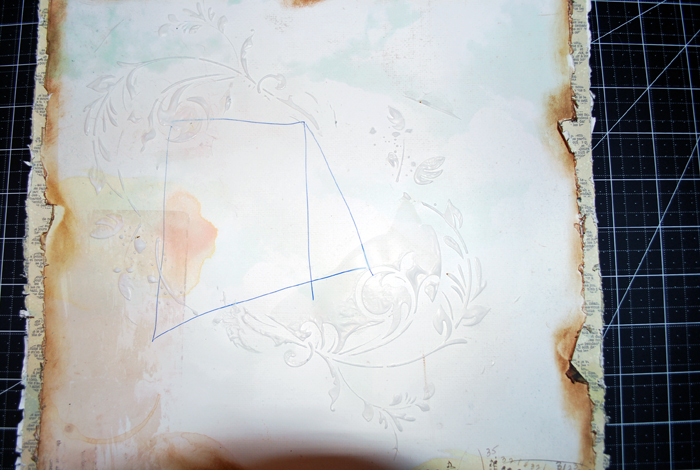
Step 7:
With a pencil, mark where the photos will be placed later
on.
Step 8:
I have used some molding paste and a Prima Mask to add some
texture around where the photo will be placed.
Step 9:
Here you can see I have used the mask all around where the
photo will go. Dry with a heat tool or air dry.
Step 10:
Spray some Tattered Angels Coffee Shop Glimmer mists where
the masking is.
Step 11:
I have taken a tea bag and let it steep strong in just a bit
of hot water. Lay that tea bag on your layout, you want it farily wet.
Step 12:
Lay some scrap paper on top of the tea bag.
Step 13:
Use your fist and hit down on tea bag. Not too hard. This
will leave a great splat on the paper. I have only done one splat because I
broke the tea bag LOL! But sometimes I will get it a big wet and do it again.
Step 14:
Use a heat tool to dry the splat or air dry.
Step 15:
Pick your embellishments. I will use the Fabscraps chippy
butterflies, the Prima Vine and I have fussy cut the bird element from the
Packaging in the kit.
Step 16:
Lay everything out and when you like the placement, use glue
and pops ups to add to your layout. I have also added in a sentiment that I had
in my stash.
I hope that you enjoyed my BAP and I hope that you give it
all a try. Please share if you try it out! Stop by the Flying Unicorn store to stock up on all your scrappy supplies!


Well, never, never would I have guessed that you got that beautiful splatter effect by pounding on a tea bag. LOL. This is so beautiful. I really love this one!
ReplyDeleteThanks for the awesome tut. I loved seeing all the layers happen.
ReplyDeleteso fabulous Shona .. this is the best tutorial .. TFS .. big hugz x
ReplyDeleteWow, what a fab page Shona and such a great tutorial, too! It's totally wonderful to see you at work like this. Great collage!
ReplyDeleteirascreacorner.blogspot.nl
Lovely layout and a wonderful tutorial. Loved seeing how this all went together. Thank you so much for sharing. ox Marg
ReplyDeletebeautifullll!
ReplyDeleteWhat a beautiful page and a great tutorial. Thanks a lot :)
ReplyDeleteSo fun to see how a LO starts and ends :)
I love your distressing and details :)
Wish you a happy Sunday :)
Exquisite page Shona & great little tutorial too. Thanks for sharing. Di xo
ReplyDeleteStunning layout and I will definitely be hitting some teabags!Love the new blog!!!
ReplyDeletewonderful Shona... such a stunning LO, and thanks so much for sharing all your great tips xx
ReplyDeleteThis one goes right to the top of favs from you Shona! I love how your eye focuses right on the picture. Great composition.
ReplyDeleteWhat a gorgeous page! I have wanted to try the teabag trick but haven't worked up the courage yet .. but soon! Love the little birdie!
ReplyDeleteVery pretty Shona and I like your new blog header!
ReplyDeleteWow such a beautiful layout Shona, and thanks for sharing your step by step, the end result is amazing!
ReplyDeleteHi Shona, I cant believe that was a teabag you used!!! Fab layout and great tut. Congrats on being the Dusty Attic Guest Designer too. Have a great day. BFN
ReplyDeleteStunning page, Shona!! Love the effect of the tea bag splat!! Thanks for the BAP!! ~ Blessings, Tracey
ReplyDeletehttp://gracescraps.blogspot.com/
Beautiful layout, Shona!!!! Love your step by step tut!! Hugs!!
ReplyDelete*giggling* can see you banging on that tea bag - really such a fab effect, would never have guessed! thanks a bunch for the tut, loved it and your page! Beautiful work sweetie! xoxo
ReplyDelete