Tuesday, August 30, 2011

Hi everyone and welcome to my blog. Wow it is almost September eeeeek! The trees are starting to turn colors here now, and I heard geese going over last nite..not a good sign no..fall is coming fast now!  Might get in one more camping trip this upcoming long weekend YIPPEE!  OK on to my layout for today...I used sketch #54 from Sketchabilities for this layout, and lots of goodies from older Scrap That! kits, including the bird cage stamp. I did lots of distressed edges, inking and the pink flowers are from my last tutorial. The cutie pie in the photo is my DGD…what a sweetie she is.  Here is the gorgeous sketch and my take on it.


Here is a close up of the distressing and the inking. The orange doily is inked with TH distress ink.

Here are some close ups of the flowers that I made. The bird cage is a Glitz stamp and I just fussy cut it out. The Dusty Attic vines are first painted white then I used a couple of mists on them and tucked them in with the flowers, and a few more goodies.


Well that is it for today. Do not forget to stop by Sketchabilities and look at all the gorgeous layouts from the Design Team. They are sure to inspire you. I will be back on Friday with a new reveal layout for SOUS and Scrap That! Thanks again for stopping by and I hope that you have a fantastic week.  Feel free to leave me some scrappy love comments, I love reading them ...take care and happy scrapping J

Sunday, August 28, 2011

Country Boy

If you are looking for the Scrap That! Blog Hop click here!

Happy Sunday everyone! Wow it is almost the end of the month and I have been meaning to do the Prima BAP sketch this month and finally had some time yesterday to make it. I also used this weeks palette from TCR. When I first saw the palette I thought to myself..ewww…gross hehe…but you know what..I LOVE IT NOW! I really do like the colors together on this layout. The photos are of my grandson, and his mom was blowing bubbles at him and he was just so amazed by them. Such a cutie J I did lots of distressing, machine stitching, and some stamping.


In these close ups you can see all the Prima flowers and goodies. The stitching is kind of hard to see..but it is there J Tucked in behind the flowers is a Dusty Attic border piece.


I inked the letters and added some liquid pearls to them. You can see the stamping that I did in the back ground.

One more close up of all the layers and distressing.

Ok well that is it for today. I am running fantastic challenge at Scrap That! this month, with a PION prize pack and you have until Midnight tonite to still get in on all of the gorgeous blog hop prizes...so head on over to the Scrap That! blog and hop along with us. Anyone can enter so swing on by and get in on the action J   I will be back on the 30th with my Sketchabilities reveal. Thanks again for stopping by and I hope that you have a fantastic week.  Feel free to leave me some scrappy love comments, I love reading them ...take care and happy scrapping J

Saturday, August 27, 2011

Shabby Chic Flower Tutorial

If you are looking for the Scrap That! Blog Hop click here!

Hi everyone, today I have a flower tutorial for you. It may have bits and pieces from tuts I have seen but this is the flower that I have come up with and I have put my own little touches on it.

Supplies Needed

flower punch – 5 or 6 petal one.  I use my cricut for these
glimmer mist and water mister
stamens
glue
gesso
ink pad
tweezers or something to curl the petals

First step is to cut out 5 flowers. I used 2 large and then the next 3 went down a size on each one. For my smaller flowers I might only use the 3 smaller flowers. I first mist them with glimmer mist then with water to get them wet enough to mold, but do not soak them or they will tear easily.

While they are wet, fold each pedal under with the scewer (I used a paint brush handle) and pinch the pedal as you do.

After you have pinched all of the flower push the paint brush tip into the center of each and pinch and fold them up.

This is what they look like all scrunched up. You can let them air dry or use a heat tool to speed up the process.

Carefully unfold each flower. At this point if you like you can ink the pedals. I only did on the blue flowers.

Punch a hole in the center of the smallest flower and add fold the stamens in half and insert into the hole..cut off the ends and glue them into place on the back of the flower.

Now start to layer the flowers, alternating the pedals and gluing them into place.

I now paint on bits of gesso in random places on the flower.

Ok that is it, these flowers are super easy to make. I actually cut out one sheet of cardstock and have enough for about a dozen of them. I will color them as I need them. Here are my finished flowers and a couple of close-ups on projects I used them on. Now go get your fingers are dirty like mine..have a fantastic weekend everyone !

Friday, August 26, 2011

Scrap That! Exclusive Pion Design “Birdsong” Kit Blog Hop

Hi everyone and TGIF! Welcome to the Scrap That! September reveal blog hop!!

If you have just arrived here from Robin’s blog you are in the correct place!  If not, head back to the Scrap That! blog for the blog hop order and links.

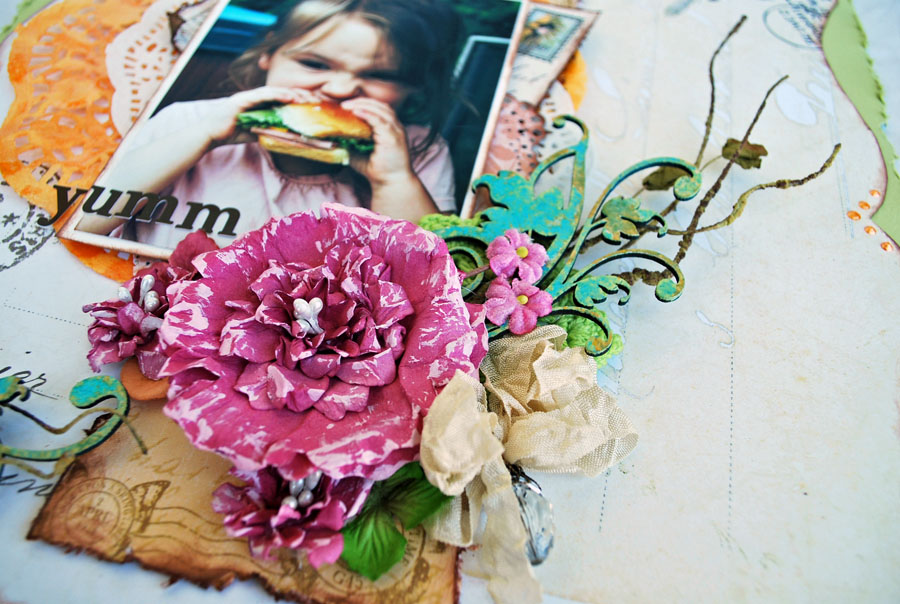
Today I’m going to share with you my projects using the Scrap That! Exclusive Pion Design “Birdsong” Kit.  This kit is so YUMMY and the embellishments go perfectly with the gorgeous Pion papers. I used the kit sketch and only the main kit ingredients on my first layout “2 Cute”. The photo is my grand daughter, what a cutie pie hehe.


I used lots of layers and did lots of inking on this layout. I made the flowers using one of the tutorials by our own wonderful Vicky. You can find it in the Forums at Scrap That!


TIP: I added drops of liquid pearls to the flowers on the base papers, this makes them pop.

For my next layout, “Kylee” I did some distressing, fussy cutting and used lots of layers.

Here are some close ups. The butterflies are cut from the Pion papers and I added some stickles and a gem to them.


“Melody of Love” ..I just love this photo of my son and wife. They are expecting a new baby at the end of the year and are just thrilled. I did lots of distressing on this layout. The only extras that I added from my stash are some ribbon and the Dusty Attic gate. The music note chippy comes in the kit. I used the sketch this month from DA. I did some leaf stamping and masking behind the flower cluster.


Some close ups.


I also made a couple of cards, an everyday card and a tealight card.  I just love the tealight cards and actually got the idea for it from the Pion Design Blog. I just know I will be making lots of these around Christmas time as little gifts.


My final project is part of one of the monthly Challenges going on at Scrap That! So make sure you stop on by there and join in on the fun. More chances to win some yummy goodies!!!


Before you hop along to Tina’s blog you will want my SECRET WORD, which is DUSTY. 

Happy Hopping! Just in case you get lost along the way here are the links to the hop J

Shona – that’s meeeeee J

**Remember, that there are FOUR prizes to win, and FOUR ways for you to enter.

1) First of all, you will need to visit all TWELVE blogs :) **This is important** Each blog will have a special word.  As you hop be sure and write down the special word from each blog. Once you have all the special words they will make a sentence.  You will need to email the SECRET SENTENCE to friends@scrapthat.ca.  All correct sentences received will be entered in a draw to win the Dusty Attic Prize Pack.  (Please note:  Dusty Attic does not have a blog but just follow the link leave a comment on the forum thread in their community.)

2) Everyone who emails us with the correct secret sentence will be sent a short marketing survey.  Once you have completed the survey you will be entered to win a Scrap That! Exclusive Pion Design “Birdsong” Kit.

3) If you want to enter to win the Grand Prize of a Pion Design Prize Pack, then head over to our COMMUNITY for details on our monthly challenge.  The challenge will run from August 26th to September 14th so you have LOTS of time to post your creations.  You can enter as many times as you like.  You do not need to be a subscriber to participate.  The more entries, the more chances you have to win!

4) Finally, if you post our blinkie on your blog you will be entered to win a Scrap That! Gift Certificate - super easy right?  Just post a link to your blog in the comments the Scrap That! Blog so we can come visit J

We hope you all had good fun hopping and got lots of inspiration today, thank you so much for playing along!  Watch the Scrap That! newsletter on September 22nd to see if you are one of the lucky winners! Have a great weekend everyone and happy scrapping J